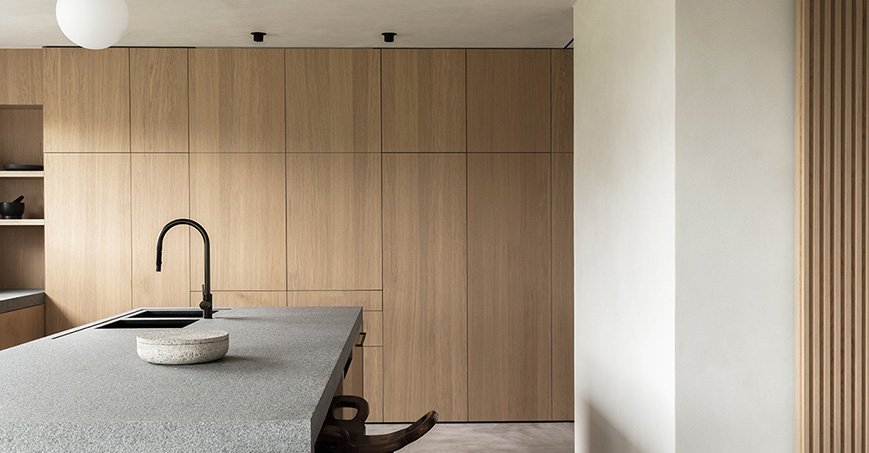
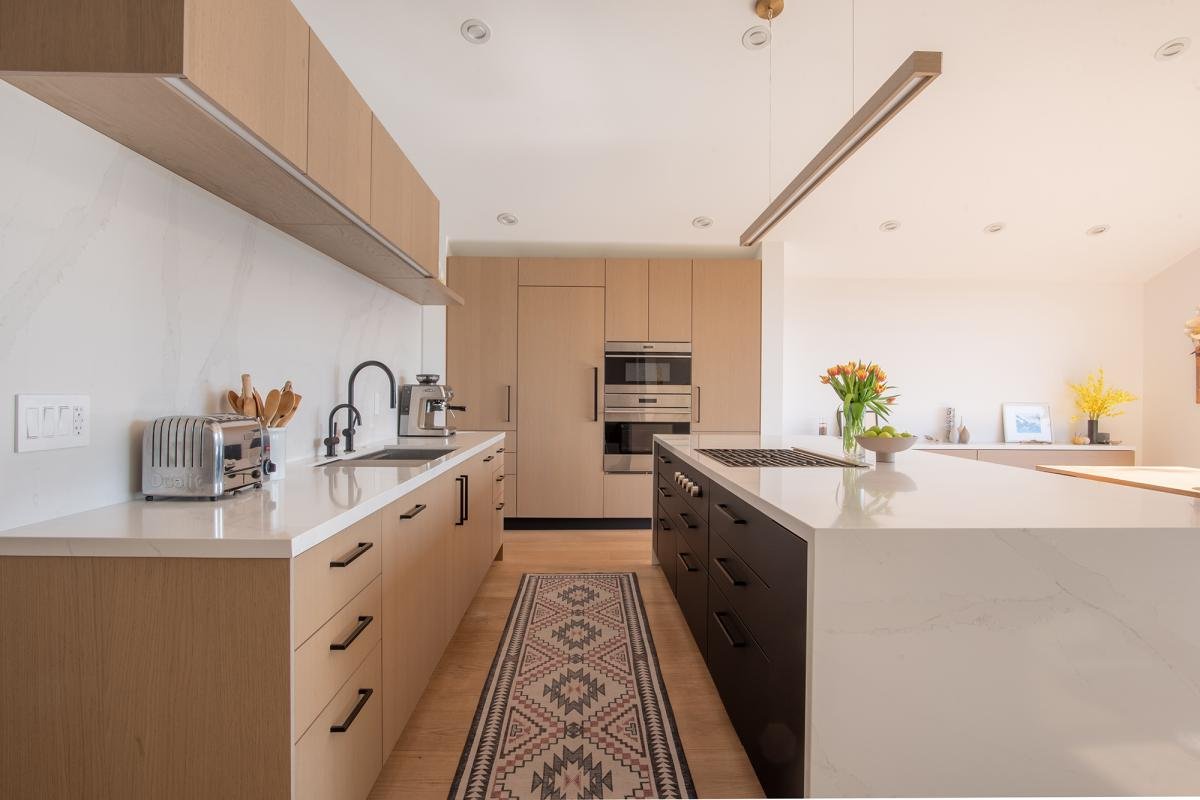
If you’re looking for a warm, natural wood finish that blends modern aesthetics with rustic charm, Shinnoki Milk Oak is a top contender. Loved for its light, natural tones and smooth texture, this engineered wood veneer offers a sleek, contemporary feel while maintaining the organic beauty of real oak.
Inspired by Chip Gaines’ approach to design, this step-by-step guide will show you how to incorporate Shinnoki Milk Oak into your home to achieve a stylish and timeless interior.
Step 1: Understanding Shinnoki Milk Oak and Its Benefits
Before diving into your project, it’s important to understand what makes Shinnoki Milk Oak a fantastic design choice.
✔ Pre-finished for Easy Use – No staining or sealing needed. ✔ Consistent Color & Grain – Offers a natural wood look without variation concerns. ✔ Durable & Scratch-Resistant – Engineered to withstand daily wear and tear. ✔ Eco-Friendly – Sustainably sourced and produced.
💡 Pro Tip: Shinnoki Milk Oak pairs well with matte black hardware, neutral wall colors, and modern industrial elements.


Step 2: Choosing Where to Use Shinnoki Milk Oak in Your Home
This versatile material can be used in a variety of ways. Here are some top applications:
✔ Kitchen Cabinets – Create a modern yet rustic aesthetic with Shinnoki Milk Oak cabinetry. ✔ Accent Walls – A great way to add warmth and texture to living rooms and bedrooms. ✔ Custom Furniture – Perfect for built-in shelving, desks, and tables. ✔ Bathroom Vanities – Add natural beauty to your bathroom with a wood-toned vanity. ✔ Closet Doors & Wardrobes – Bring elegance and functionality to storage spaces.
💡 Pro Tip: Pair Milk Oak cabinets with white quartz countertops and warm brass accents for a chic, timeless look.
Step 3: Preparing for Installation
Once you’ve chosen where to use Shinnoki Milk Oak, it’s time to get prepped!
✔ Measure Twice, Cut Once – Ensure all dimensions are accurate before ordering or cutting materials. ✔ Choose the Right Finish – Matte and satin finishes work best to enhance the natural grain. ✔ Select Complementary Colors – Stick to neutral or earthy tones to highlight the wood’s natural beauty. ✔ Plan for Lighting – Proper lighting will enhance the warm undertones of the wood.
💡 Pro Tip: Use LED warm white lighting to make the soft wood tones pop.


Step 4: Installing Shinnoki Milk Oak in Your Space
Depending on the project, installation methods may vary:
✔ For Cabinets & Furniture:
- Use pre-cut veneer panels to cover cabinetry.
- Secure with wood glue or nails, ensuring even application.
- Sand edges and finish with protective sealant if needed.
✔ For Accent Walls:
- Install plywood backing for added stability.
- Attach veneer panels using wood adhesive and finishing nails.
- Seal with a clear matte finish for long-term durability.
✔ For Bathroom & High-Moisture Areas:
- Apply a water-resistant sealant before installation.
- Use moisture-resistant backing boards to prevent warping.
- Avoid excessive exposure to water and steam.
💡 Pro Tip: Floating shelving made from Shinnoki Milk Oak adds an effortless modern touch to any space.
Read More in Kitchen Promise Blog
- Guide to Bathroom Vanity: Luxury Finishes and High-End Inspirations
 Luxury bathroom vanities define a remodel with elegance and sophistication. From marble and quartz tops to exotic woods and custom cabinetry, this article explores finishes, hardware, and styles that elevate bathrooms into spa-like retreats. Discover how the right vanity transforms function into artistry.
 - Affordable Bathroom Remodel Sacramento CA: Minimalist Spaces, Maximum Style
 Minimalist bathrooms deliver calm, modern beauty without overspending. This guide explores cost-effective ways to achieve simplicity through neutral palettes, smart storage, and thoughtful material choices.
 - How Exteriors Remodeling Gave Our Home Its Signature Style
 A beautifully designed home should begin long before you step inside. In this elegant, Sarah Richardson–inspired story, we explore how a thoughtful exteriors remodeling project transformed a flat, dated facade into a warm and welcoming statement of style. With rich material choices, curated finishes, and quiet architectural confidence, the home took on a signature look that reflected both personal taste and timeless design principles. Learn how this renovation changed not just the house’s appearance, but how it felt to live there—and how curb appeal became a meaningful part of everyday living.
Step 5: Styling Your Space with Shinnoki Milk Oak
Once installed, it’s time to tie everything together with cohesive styling.
✔ Minimalist Décor – Let the wood be the star by keeping décor simple. ✔ Natural Elements – Pair with plants, linen textures, and stone accents. ✔ Mixed Metals – Combine with matte black, brushed nickel, or brass fixtures. ✔ Soft Neutrals – Use warm whites, beiges, and grays to maintain balance.
💡 Pro Tip: Shinnoki Milk Oak works beautifully with Scandinavian, Japandi, and modern farmhouse styles.
Step 6: Maintenance & Long-Term Care
To keep your Shinnoki Milk Oak surfaces looking their best, follow these simple care tips:
✔ Use a Damp Cloth – Wipe with a soft, damp cloth to remove dust and dirt. ✔ Avoid Harsh Cleaners – Stick to pH-neutral wood cleaners to protect the finish. ✔ Prevent Scratches – Use felt pads under furniture and avoid dragging heavy objects. ✔ Control Humidity – Maintain a stable indoor climate to prevent expansion or warping.
💡 Pro Tip: If scratches appear, lightly sand the area and apply a matching touch-up stain.
Final Thoughts: Elevate Your Home with Shinnoki Milk Oak
Whether you’re remodeling a kitchen, designing a statement wall, or upgrading furniture, Shinnoki Milk Oak brings sophistication, warmth, and timeless charm to any space.
✔ Modern yet warm aesthetic that suits any style. ✔ Easy-to-install and pre-finished for convenience. ✔ Works beautifully in kitchens, bathrooms, and living areas. ✔ Low-maintenance and durable for long-term use.
By following this step-by-step guide, you can confidently incorporate Shinnoki Milk Oak into your home, ensuring a look that’s both stylish and enduring.

